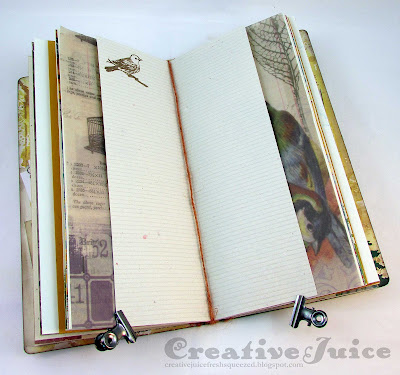
In case you haven't heard, the Journal Dies have hit the streets! There has been a ton of interest in this fabulously versatile new die – lots of mind blowing journals are being shared daily. (All month long they are being featured on Eileen Hull's blog and she created a special Pinterest board just for the Journal projects.) I for one have a long list of Journal ideas that I want to make. The possibilities really are endless! At the top of my list was to make a bird watching journal so I can keep track of all the new feathered friends I'm seeing around the yard. We have a lot of action! A beautiful journal is perfect to replace the boring little lined notebook I was using.
 |
| Bird Watching with style! |
 |
| Inside cover & first signature |
Here's a selection of inside pages. I left lots of empty space so I'd have room to write.
 |
| I made a little bookmark clip to keep track of where I am in the journal. |
And now for a bit of a tutorial if you're still with me. Also, Eileen has a great post HERE with instructions and videos on how to assemble a journal (covers, binding and inserts).
1. I carefully selected the parts of the patterned paper (Tim Holtz Wallflower) I wanted to be on the front and back covers. I used Glue n' Seal to adhere the paper to my sheets of matboard before I cut the journal covers out.
I did the inking, stamping and stenciling on the inside covers before gluing them together. I could have added the ephemera and diecuts either before or after.
 |
| Inside of assembled cover |
I didn't have enough width of my cover paper to entirely cover the spine so I was left with an empty strip after gluing it together. No problem! I just cut a strip of marbled paper that matched the paper I used on the front to fill it in. I like how it accents the front.
 |
| Outside of assembled cover |
The ink transferred into the embossed design. I like how it looks grungy and worn. Don't forget to clean up your folder right away.
3. Creating the inside signatures was a lot easier than I thought it would be. I raided my paper stash for a selection of interesting text weight paper to use. I trimmed them to the proper height but only roughly trimmed them to the right width. (They got trimmed all at once after I had stitched them together.) I made a little stack to see how the papers looked together:
I stamped the pages before binding them together. Make sure you don't stamp in the edges that get trimmed off!
One of my teammates shared this video with us on how to make your own inserts. I found it very helpful and it has clear explanations on binding and trimming the signatures.
I chose to use a three-hole pamphlet stitch to bind my inserts. I clipped the pages together to keep them from shifting and carefully poked the holes through the fold.
I used button hole thread (a heavy thread) to stitch it.
All three signatures ready to go! I flattened them overnight under a pile of heavy books. Eileen mentioned that she ran hers through the Big Shot to flatten them.
 |
| I added balloon images as a nod to the hot air balloons that fly over our house. I'll have to add sightings of those to my journal as well. ;-) |
To bind them into the cover I used jute string and honestly just kind of winged it on how I tied them in. I'm not sure I could duplicate it again or explain it lol. Eileen explains several different ways in her videos and you can experiment. I don't think there is really a wrong way to do it! In this first journal I made I used elastic cord which is simple to do. Check out that tutorial for more info.
Thanks for stopping by and reading my really really long post! Have a great week and go get creative!
The supplies I used for this project can be found at Sizzix or Simon Says Stamp. Follow the links below and a shopping you may go!


What an amazing job. I LOVE this!A beautiful journal!
ReplyDeletelove it!
ReplyDeleteYour bird watching journal is definitely stylish Lisa! The Tim papers on the cover look amazing and I love your colour blend embossed front plate - that marbled paper looks so beautiful there and on the journal edge. I just love the whole thing!! Anne x
ReplyDeleteOMG this is totally awesome.
ReplyDeletehave to try this too!
Love everything about this - the embossed die cut on the front added so much texture!
ReplyDeleteAll of the elements you added were perfect for the bird them- such a cool journal and excellent tutorial too. And it's true- no wrong way to do it- yay!
ReplyDeleteLisa I am such a fan of your work, this is another stunner!!
ReplyDeleteSimply beautiful!
ReplyDelete